Intro
The Cone Calculator is the first screen of the application. Here, you insert your cone parameters and calculate the values for the next steps of the conversion process.
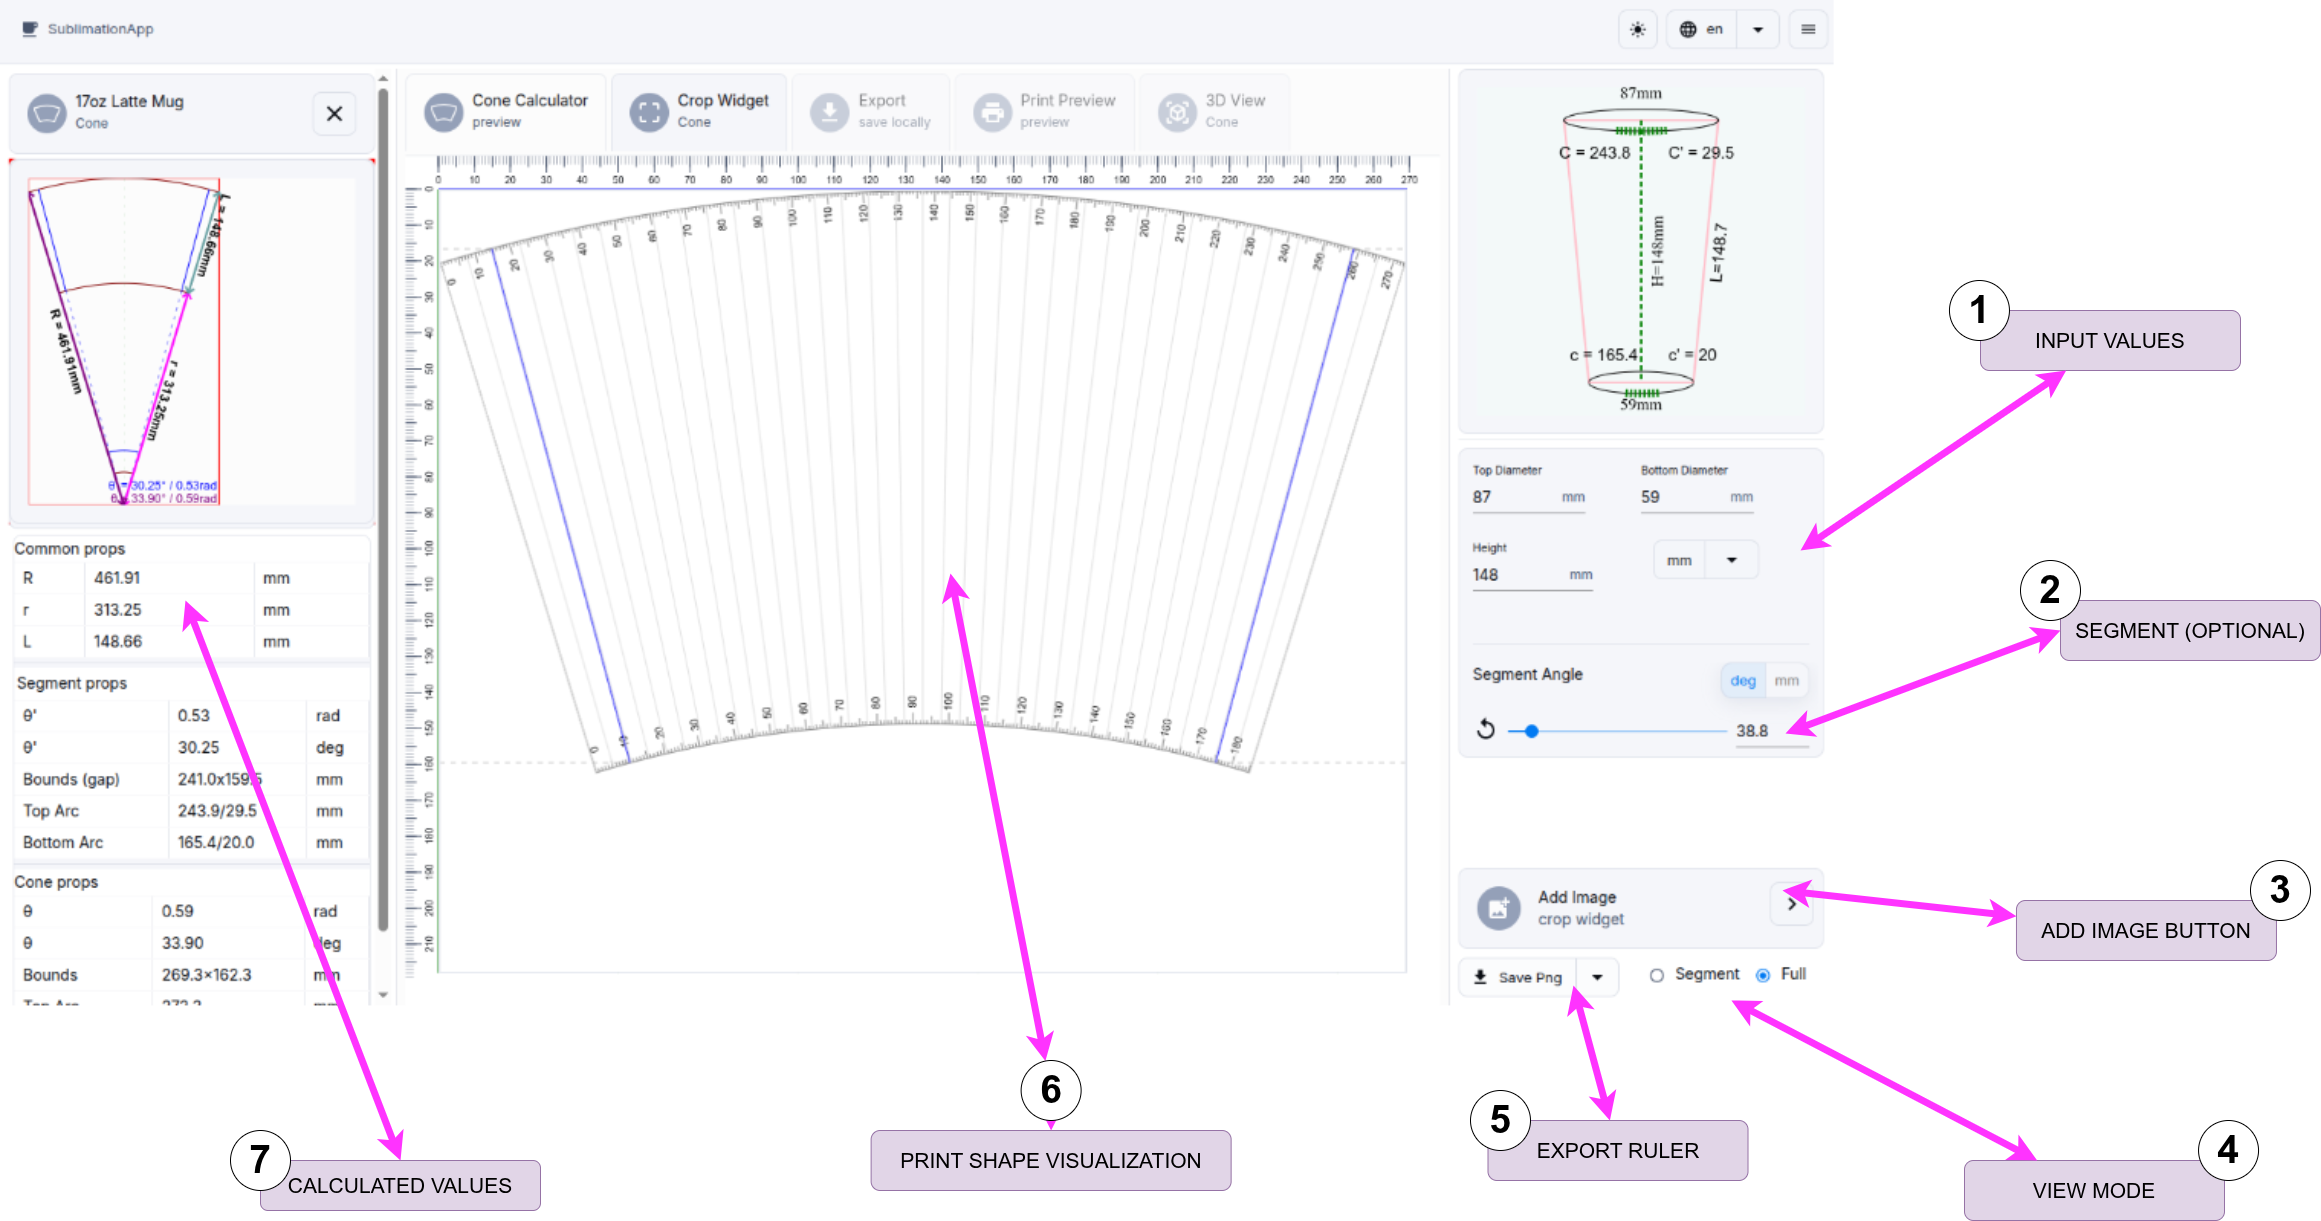
1. Input Cone Values
First, you'll need to enter the Top Diameter, Bottom Diameter, and Height parameters into the corresponding form fields.
| Parameter | Purpose | Units |
|---|---|---|
| Top Diameter | The diameter of the cone's top. This should be the larger of the two diameters. | inch/mm |
| Bottom Diameter | The diameter of the cone's bottom. | inch/mm |
| Height | The vertical height of the cone. | inch/mm |
Check out the Input Cone Values page for more details.
2. Segment Cut-off
Define a Segment or Cut-off portion that will be omitted from the final design. This is useful if you want to print on only a portion of the conical product rather than wrapping it entirely.
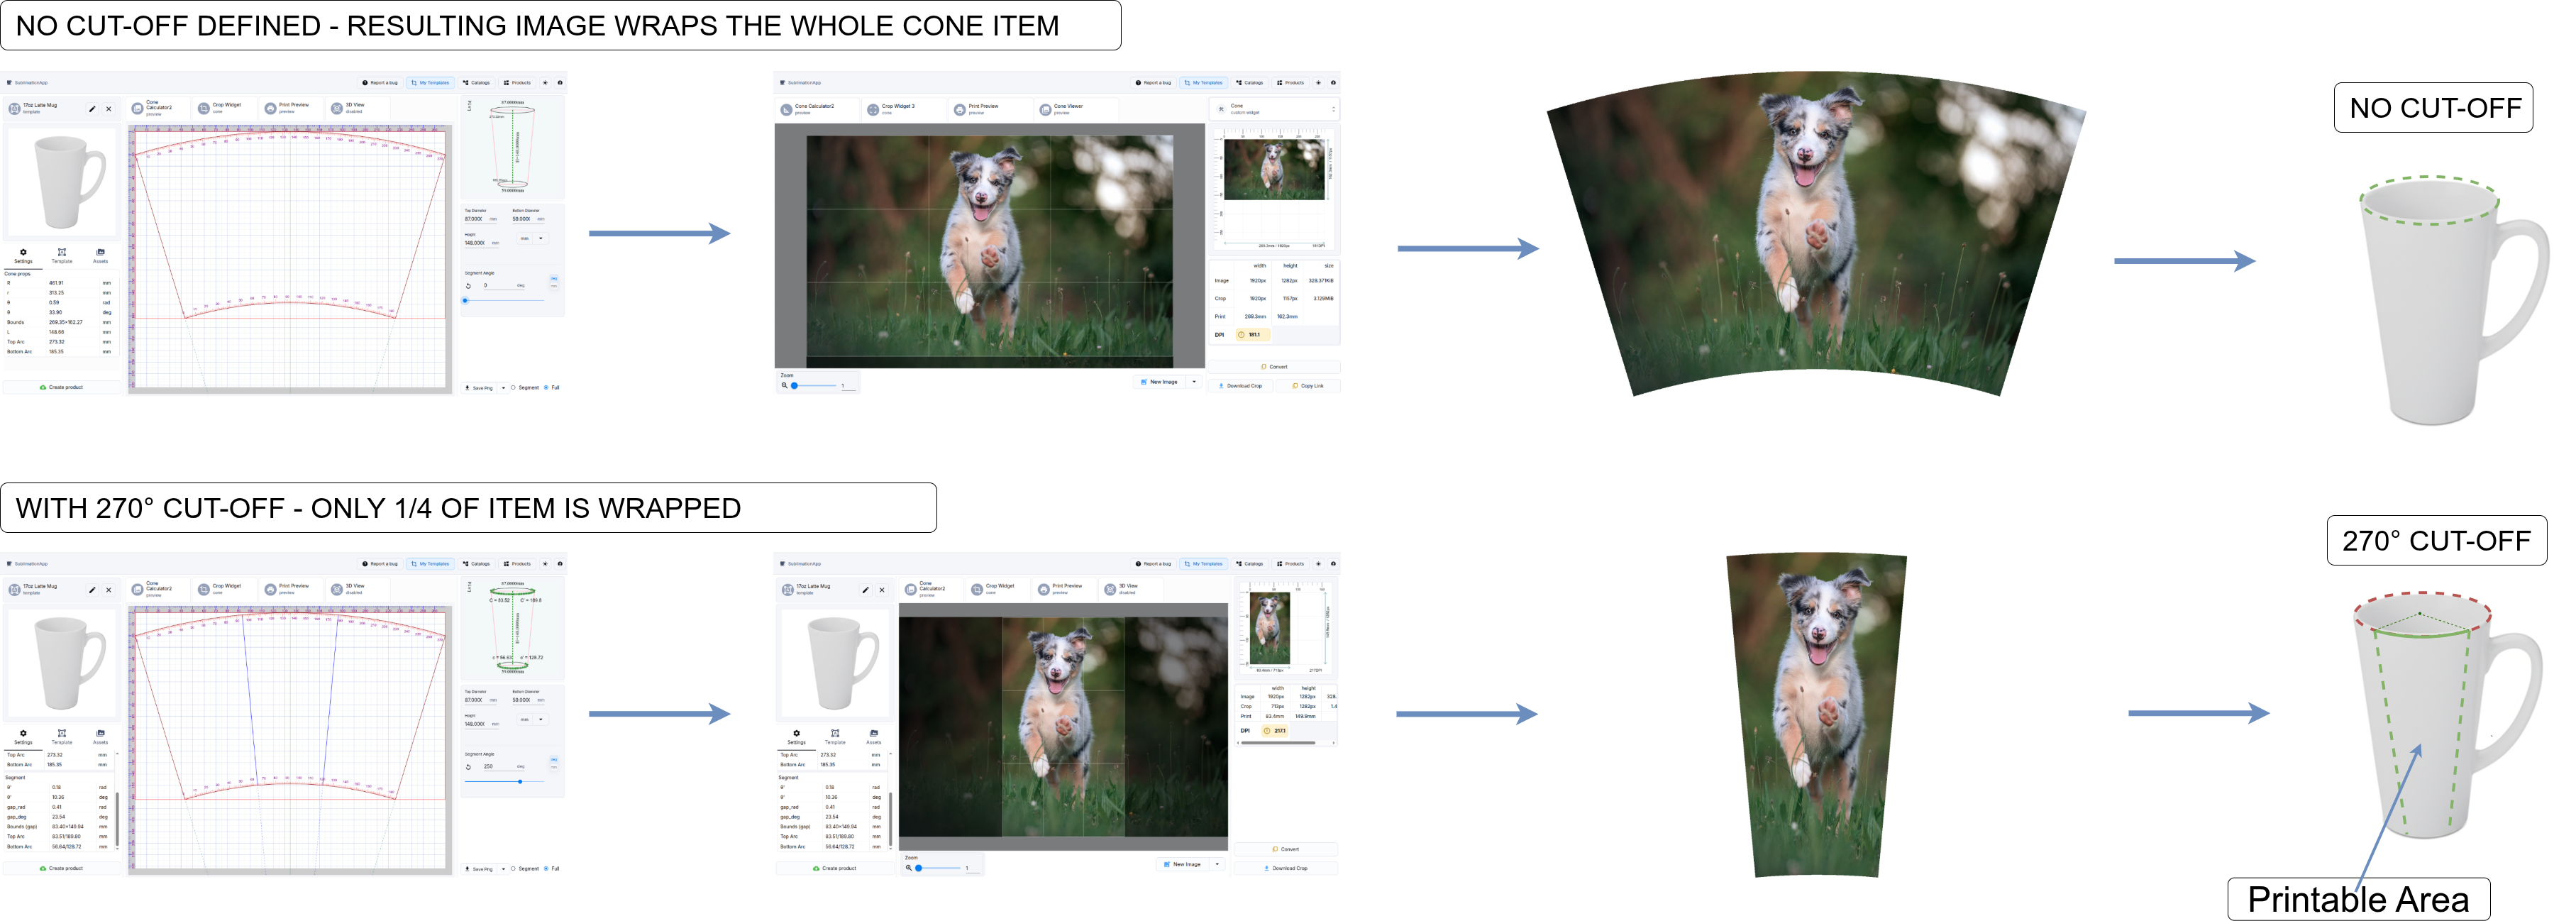
Check out the Segment Cut-off page for more details.
3. Add Image Button
Press the "Add Image" button or click on the "Crop Widget" tab to switch to the image cropping interface.
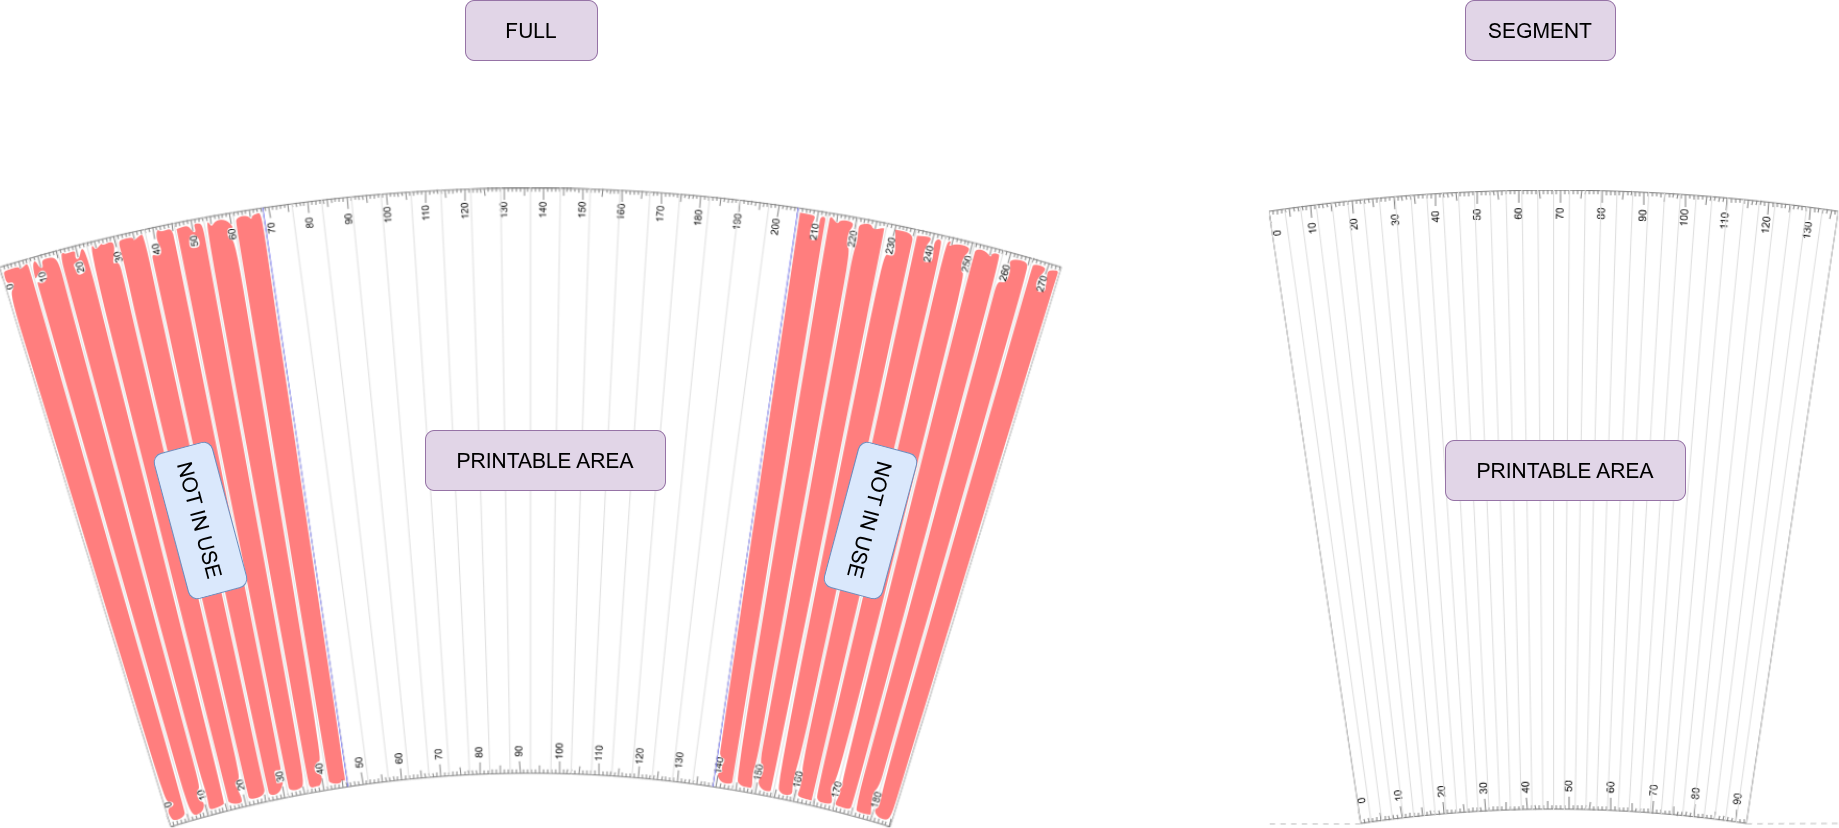
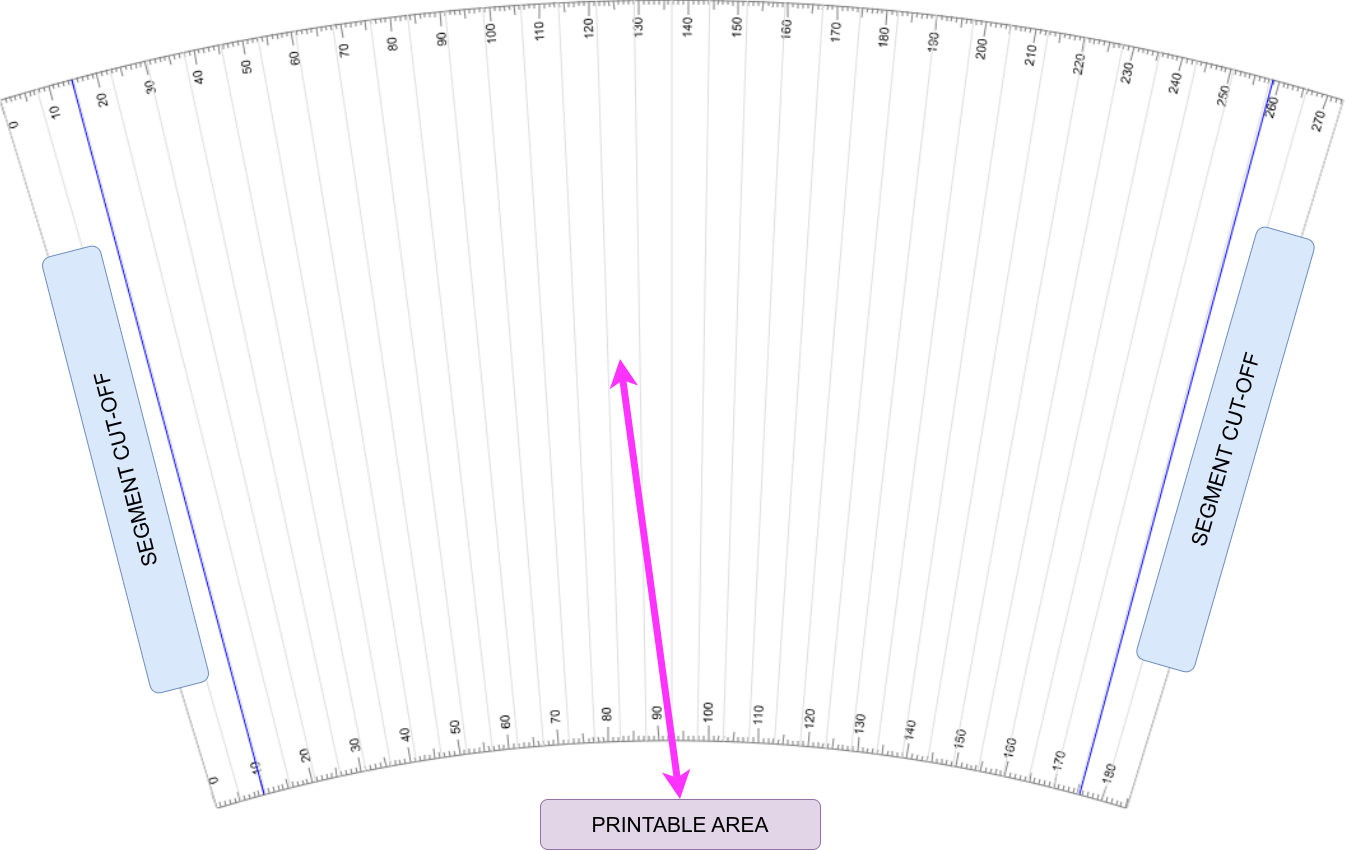
4. View Mode
When setting a Segment Angle greater than 0, two views are available:
5. Export Ruler
The ruler generated by the calculator can be exported for printing or cutting.
| Format | Notes |
|---|---|
| PNG | High-resolution raster image. |
| SVG | Contains the generated shape in vector format, suitable for cutting devices. |
6. Printing Shape Visualization
7. Calculated Values Table Legend
Check out the Calculated Values Table for more details.